
The advent of Apple File System (APFS) has significantly altered the landscape of macOS digital forensics. While offering performance and security benefits, its unique architecture, particularly the concept of “containers” holding multiple “volumes,” introduces new considerations for forensic imaging. Understanding the differences and knowing how to adapt your approach is crucial for successful data acquisition.
The APFS Container and Volume Distinction
In HFS+, a single partition typically contained a single volume. APFS, however, introduces a container (a partition) that can host multiple volumes. For example, a standard macOS Ventura+ installation will often have at least two key volumes within a single APFS container:
- System Volume: This volume (e.g., “Macintosh HD”) is read-only for security reasons and contains the operating system’s core files.
- Data Volume: This volume (e.g., “Macintosh HD – Data”) is where user data, applications, and mutable system files reside.
While these volumes appear separate to the user, they share the same underlying container space, and some files might be hard-linked across them.
Why “Container Imaging” Can Be Tricky
The ideal scenario for many examiners is to image the entire APFS container, theoretically capturing all volumes and their underlying structures. This “whole container” approach aims for completeness, providing a comprehensive snapshot of the disk.
However, container imaging can sometimes encounter challenges, leading to failures or incomplete acquisitions. Several factors can contribute to this:
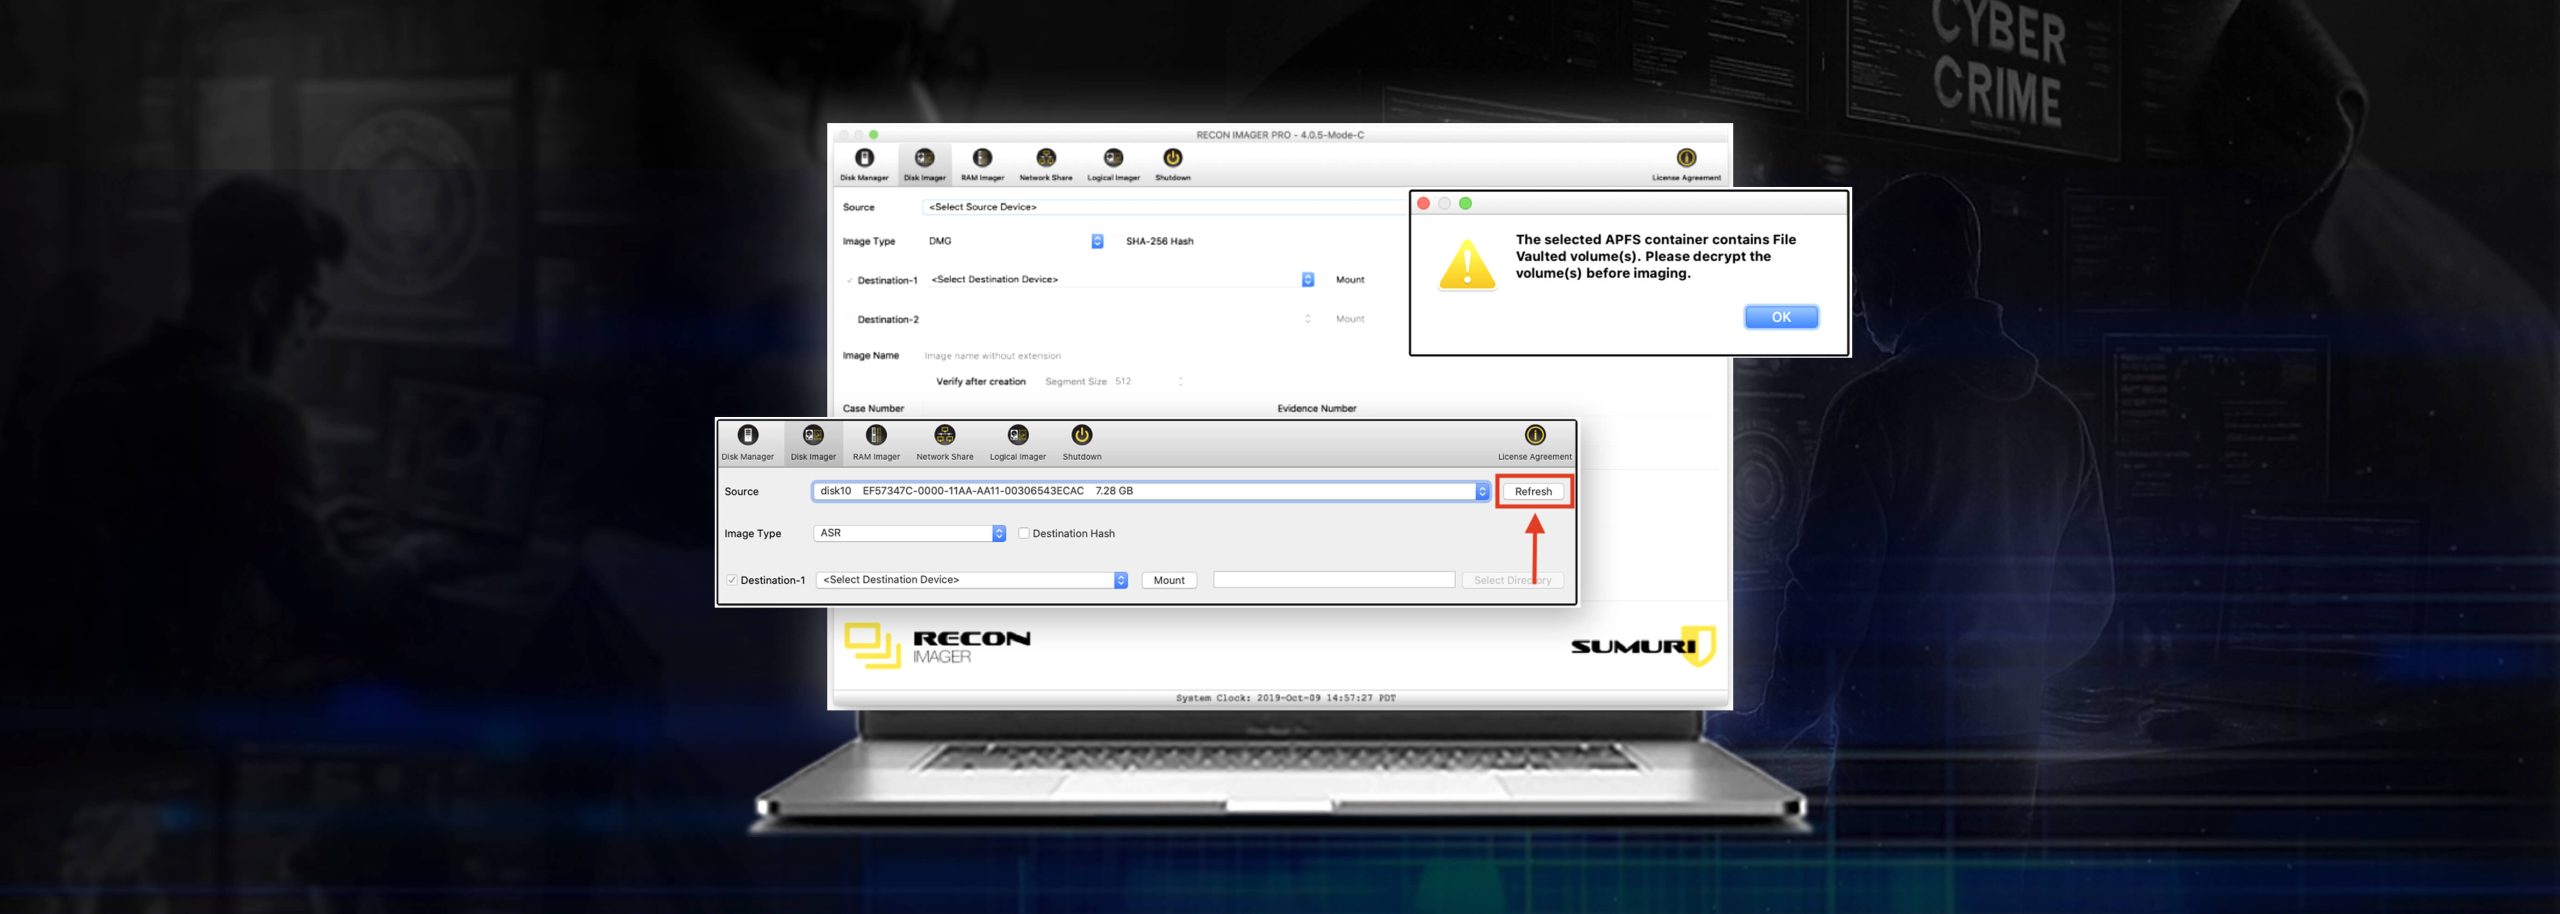
- asr Verification Failures: The asr (Apple Software Restore) command, which is typically used to image APFS containers, is managed and directed by Apple’s macOS environment. If the container does not pass certain verification checks (e.g., a “broken seal” on the System Volume, or other structural inconsistencies), asr will often fail to create a full container image. This is a design decision by Apple to ensure integrity, but it can be a significant hurdle for forensic acquisition.
- Corruption or Damage: If the container’s metadata is corrupted, or there are bad sectors at the container level, a full container image may fail.
- Encryption and Unlocking: Whether you’re targeting the entire container or individual volumes within it, if the data is encrypted (e.g., with FileVault), it must be decrypted or unlocked before an image can be obtained. This typically requires either the user’s admin password or the FileVault recovery key.
When a full container image fails, it doesn’t mean the data is inaccessible. It often points to the need for a more targeted approach.

Understanding Slack Space and Unallocated Space in APFS
It’s crucial to clarify a common misconception with APFS imaging: neither imaging the entire container nor individual volumes within it will capture “slack space” or traditional “unallocated space” in the same way a “bare metal” disk image of an HFS+ drive would.
This is due to the fundamental design of APFS:
- Logical Storage: APFS allocates space dynamically. Volumes within a container share the same free space. When a file is deleted, its blocks are quickly marked as available for reuse within that shared pool, not as static “unallocated” areas.
- SSD Data Management: APFS is optimized for Solid State Drives (SSDs), which employ sophisticated data management techniques like TRIM. TRIM commands inform the SSD controller which data blocks are no longer in use, allowing the drive to internally erase or “garbage collect” that space. This means even if you could capture “unallocated” blocks, they might already be zeros or filled with meaningless data by the drive’s firmware.
Therefore, for APFS filesystems, the concept of rich, discoverable data residing in slack or unallocated space is significantly diminished compared to older file systems on HDDs. While block-level imaging tools capture the physical blocks of the container or volume, the logical structure and SSD data management mean there’s often little forensically relevant data to be recovered from “unused” space through these methods. Examiners typically focus on allocated files and file system metadata for artifacts.
The Power of Volume-Specific Imaging (and Rsync as a Fallback)
When container-level imaging proves difficult, focusing on individual volumes, particularly the Data Volume, often becomes the most practical and successful strategy. The Data Volume contains the vast majority of user-generated forensic artifacts.
Targeting the Data Volume directly offers several advantages:
- Higher Success Rate: By focusing on a specific volume, you bypass potential issues tied to the broader container structure, especially if the problem lies in the system volume or container overhead.
- Reduced Data Size: Acquiring only the necessary volumes can lead to smaller image files, saving time and storage space, particularly relevant in large-scale investigations.
- Direct Access to User Data: The Data Volume is where the critical user activity, applications, and document files reside.
In situations where even direct volume imaging through traditional block-level methods faces hurdles – perhaps due to the live environment, specific file system states, or partial corruption – logical acquisition methods like rsync become invaluable.
rsync is a powerful command-line utility used for syncing files and directories. In a forensic context, it can be leveraged to:
- Bypass Block-Level Issues: Instead of reading raw blocks, rsync works at the file level, allowing it to skip over problematic sectors or metadata errors that might halt a block-level image.
- Target Specific Data: Examiners can precisely define what files and folders to copy, ensuring only relevant data is acquired.
- Handle Live Systems: rsync can be particularly effective in live environments where a full shutdown or reboot for a block-level image might not be feasible or desirable.
While rsync provides a logical acquisition rather than a forensic image in the strictest sense (e.g., it doesn’t capture slack space), it is an indispensable tool for data recovery and acquisition when block-level methods fail, providing access to critical files that might otherwise be lost.
How Tools Like RECON ITR Help
Modern forensic imaging tools are designed to provide flexibility and intelligent guidance for these complex scenarios. For instance, RECON ITR incorporates features that reflect these best practices:
- Intelligent Source Selection: When performing an acquisition, RECON ITR will often highlight the APFS Data Volume as the most relevant target, guiding examiners toward the most forensically rich dataset. This reflects the understanding that often, the Data Volume is the primary target.
- Clearer Communication: If a container imaging process encounters an issue, messages are now designed to recommend targeting the APFS Data Volume, providing immediate, actionable advice to help examiners overcome acquisition hurdles.
- Accurate Volume Information: Displaying the used size of APFS volumes (rather than just the container size) within the tool helps examiners make informed decisions about storage requirements and the scope of their acquisition.

In an APFS world, adapting your imaging strategy is key. Understanding when to pursue a full container image, when to pivot to a specific volume like the Data Volume, and when to leverage logical acquisition methods like rsync, ensures that you can successfully acquire the evidence you need, even from the most challenging macOS systems.