
Mac Imaging Go Bag Essentials
Mac Imaging Go Bag Essentials
How often have you gone on scene and realized that the Mac has some port you didn’t prepare for? How often have you attempted to conduct an acquisition over Target Disk Mode and then realized that the cable you’re using wasn’t working? How many times have you attempted to make an acquisition to a Mac that only has two ports?
One of the essential things for any examiner to have is a fully ready go-bag to include your favorite compact keyboard and mouse/trackpad. In addition to your favorite input devices, some of the most important parts of a go-bag are cables, hubs, and dongles. A Mac imaging go-bag is no exception.
In order to help make sure each and every examiner is prepared for any Mac they might encounter, we thought it might be helpful to show some of the most common tools that can make the difference between a successful image versus a lot of painstaking documentation on how you were unsuccessful.
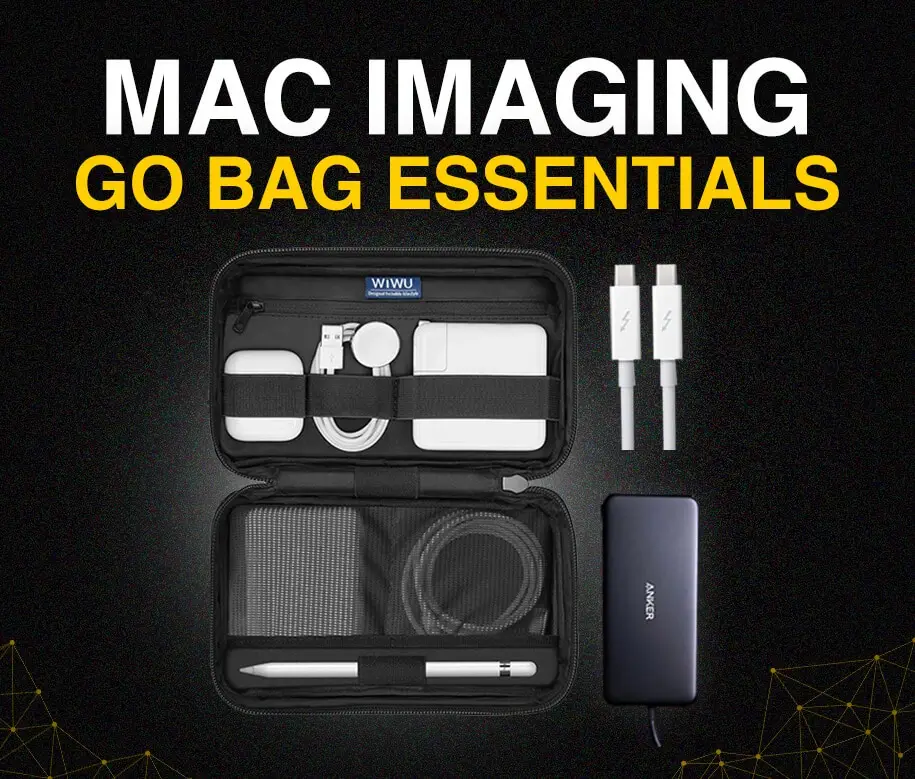
First in our bag is a ThunderBolt 3 cable. Thunderbolt 3 is an interface that Apple has developed, allowing blazing-fast transfer speeds (up to 40 Gbps) and the capability to connect two Macs together via Target Disk Mode or Share Disk Mode. The price for Thunderbolt 3 cables increases with the length. We have seen a varying performance with off-brand Thunderbolt 3 cables, so we would recommend sticking with Apple’s own cables.
For more info, check Apple Thunderbolt 3 (USB-C) Cable
Thunderbolt also comes in various iterations depending on the year of Mac you’re working with. Thunderbolt 2 has been phased out of Macs as Apple moved towards USB-C but is still present on many Macs from 2011 to 2017. A Thunderbolt 2 cable can be handy for completing Target Disk Mode images, but it isn’t going to be as widely used moving forward. As with the Thunderbolt 3 cables, these can be quite expensive, so we’d recommend sticking with the shortest version they offer just in case you ever need it.
For more info, check Apple Thunderbolt Cable
While you’re at it, you can never be too prepared for Mac imaging. In the event that your agency’s Mac is blessed with nothing but USB-C ports, you will need to pick up a Thunderbolt 2 to Thunderbolt 3 connector. This will allow you to interface between Thunderbolt 2 and 3 with the use of only one cable and one dongle.
For more info, check Apple Thunderbolt USB C Adapter
Speaking of a USB-C favored market, we’d recommend picking up a USB-C hub. From a consumer standpoint, USB-C is awesome because it works with almost anything on the market. From an examiner’s standpoint, it can be a nightmare to keep track of all the cables and adapters to ensure you’ve got something that can work for any situation. That’s why we’d recommend picking up a USB hub like the one below, with plenty of port options to keep you covered even if your Mac only has two ports. The Anker hub that we recommend will keep you covered with a number of fast USB-A ports, a dedicated USB-C port to keep the device powered, and more.
For more info, check ANKER POWER
For old-school examiners that still use a 2.5” SATA HDD for their destination drives, we recommend picking up one of these SATA to USB 3.0 adapters. Keep in mind that these are not write-blocked but support fast transfer speeds, making them perfect for destination drive compatibility. The added feature of external power ensures that even under heavy transfers, drives will continue to operate as expected. This model is also very easy on the wallet, making it a good choice for almost any examiner with any budget.
For more info, check WEme USB 3.0
Finally, we’d recommend picking up a travel case to hold all of our cables and dongles! Any case could work, but we found one that should help keep all of your chargers, adapters, and more organized and together.
For more info, check WIWU Travel Cable Organizer Bag
Thanks for taking the time to read through this! If you find this type of content helpful, please feel free to reach out to hello@sumuri.com to let us know!
Upcoming Courses


- By admin-SUMURI
- Categories: Blog
Share This Story, Choose Your Platform!
Related Posts

Why Use a Mac for Mac Forensics
Dave Melvin
March 28, 2023

Why Take the CFME? The Mac Forensics Certification for Digital Forensic Examiners
admin-SUMURI
October 2, 2024